Page profiles is a system that let you organize your pages into groups and attach them to profiles. You can create in that way individual layouts for any page, doesn’t matter if it is a product, a category at any level, the front page or a information page.
Install Page profiles
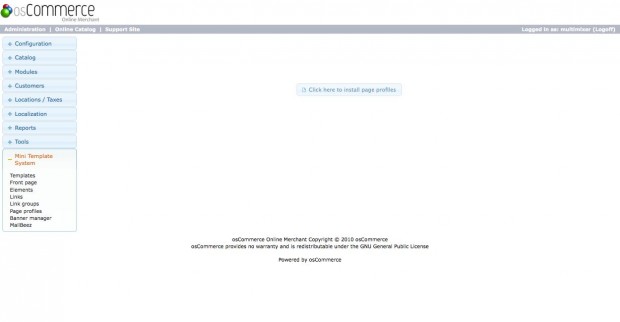
First step is to install page profiles. That’s an easy process, all you have to do is to go to the mini template system area of your administration panel, click on “page profiles” and then click the “install” button in the middle of the page
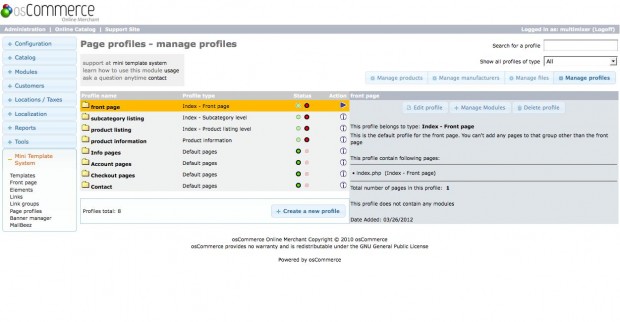
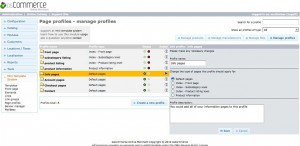
The installation will create all necessary database tables and import the sample data. The page will look now like this
Seeing this page means that page profiles are correctly installed.
The concept
Before going further, let’s take a minute to understand the concept. This will help you to understand and manage the whole system in a better way.
Page profiles are a collection of settings regarding the display of various modules. Not all modules are meant to be used on every page, so there are modules for the front page, modules for the product information pages, but also modules for all pages, like for example the boxes.
Having this in mind, you will understand that each page profile has a specific “profile type”, depending on the modules it is supposed to manage and the pages that can be attached to it
There are 5 types of page profiles, according to the 5 types of pages that exist in your osCommerce installation:
- Default pages: That are all regular osCommerce pages that do not belong to any of the categories below
- Index – Front page: This is the front page. There is just one front page in your store
- Index – subcategory listing: That are the pages that list categories that have subcategories attached
- Index – product listing : That are the pages that list the products
- Product information: That is the page that display the product details
Each page profile must belong to one of that groups. You can create of course as many profiles as you want for each category, so you can have several profiles for the front page or for the product information page
Using page profiles
The page profiles area consist of 4 main sections:
You can reach this sections by clicking the buttons on the top of the page
Manage profiles
This is the “heart” of the system, the place where you can create, edit and manage the page profiles and do settings for any of the modules
profiles – overview
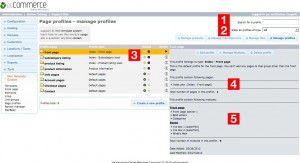
At the page profiles front page you have an overview of all page profiles that you have created
The listing on the left contain the profile ID, the profile name, the profile type and the profile status
You can change the profile status by clicking the red or green icon. In case a profile is disabled, all pages attached to it will display in default mode while all profile settings will be preserved, so you can enable it any time easily
On the right side you get an overview about the contents of this profile, about any pages, products, categories or manufacturers attached to it and about any modules that this profile contain
profiles – create, edit and delete a profile
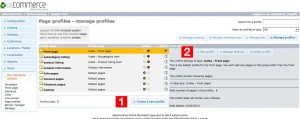
To create a new page profile, click on “create new profile” at the bottom of the page. To edit an existing one, you can select it from the list and then click “edit” on the right side.
In either case you can add / edit the page profile name and description. Both entries are just for internal administration use, your page visitors will not see them, so you can use anything you like
Next thing you can do here is to select the profile type this profile is for. Here you need basically to answer the question ” what kind of pages do I want to manage with this profile ?”
Please note that, in case a profile has already pages attached, you can’t change it’s profile type any more. You need either to remove all attached pages or just create a new one, that is maybe easier to do
To delete a page profile, just click “delete” on the right side. Please note that, when deleting a profile, all pages attached to that profile will display using the default page layout
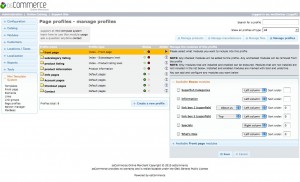
This is the part where you can do profile specific settings for any modules. Depending on the profile type, you will get a list of all available modules for this profile type.
For example, if the profile you want to manage belong to type “front page”, you will get all general modules (like the boxes) and the special front page modules. If the case belong to type “product listing” you will get the special product listing modules and any other modules meant for product listing pages.
That modules you can now manage. Keep in mind that any settings you do here, are specific settings for the concrete page profile and will not affect the general module settings or setting for the same module for an other page profile
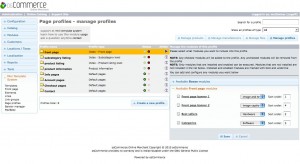
Depending on the module type, there are different settings to do. Basic settings for all boxes are the position (left or right) and the sort order you want them to appear. So you can say that for “profile A” you want the “new products” box first, then the “specials” box and finally the “reviews” box and all on the right side of the page. For “profile B” you want a “link box” first and then the “new products” box, both to be on the left side of the page
For the link boxes, you can additionally set the content you want to display there. That mean that you can re-suse the same link box several times, in several profiles having a different content each time but also preserving any other settings for this box. For example, you can say that a specific link box should display links to information pages in page profile A, and a products category for profile B and the main navigation for profile C. All other settings, like colors etc will be same
Same you can do for any other module groups, like the front page modules. So you could set up 2 or 3 profiles for the front page, and use for profile A a banner slider with banner group 1, after that the main categories, and for profile B, the same banner slider but with a different baner group and the new products module just after. It is more than easy to attach then a profile to a page, this comes in the next chapter.
Important to remember is, that you can only manage modules that are installed. You can not manage any boxes for example that are not installed. The modules do not need to be enabled, you can install them and keep them disabled, so you can do settings for them, even they will not display on the page till you enable them
Please also note that, in case you remove a module, it will be removed from the page profile too. In case you enable it again at a later moment, you will need to add it again to any profiles you want
Manage default files
After you have your page profiles configured you can go on and add pages to that profiles. First type of pages are the default osCommerce pages, like the index page, product listing – and product information pages, the login and create account page etc etc
Add default files to profiles
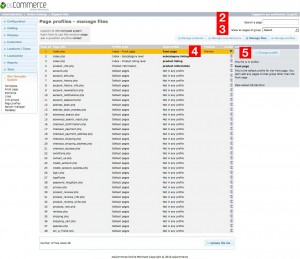
To get to this area, please click on “manage files” at the top menu.
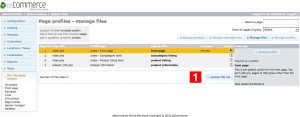
First thing to do here, is to update the files list. To do so, click the “update files” button at the bottom of the page. This will create a list of all files in your osCommerce installation. In case you delete any files from your installation at any time, please click the “update files” button again, to remove them from this list too.
The listing of your files contain
- the file name: This is the same like what you have in the url when navigating to that page on the front side
- The profile type: This is the type this page belong to. You will notice that all files belong to “default”, except the 4 first entries. Please read about this below
- The page profile: Here you can see to what page profile the page is attached to
- Preview: Here you can preview the page in a fancybox window, without having to navigate through the stores front side. So you can check how a specific page look like when attached to a profile and do changes accordingly
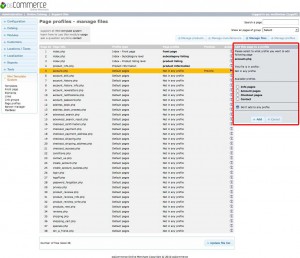
To attach a page to a profile is easy. Click on “add to profile” on the right side and select the profile you want to add this page too.
Depending on the page/profile type, you will get a listing of all profiles available for this type of page
If you want to add for example the “contact us” page to a profile, you will get all profiles of type “default”, since the contact us page belong to the default pages. If you do the same for the front page, you will get all profiles of type “front page” etc. The profiles you get listed are whatever you have previously created when setting up the page profiles
For sure you noticed that most of the files of this list, belong to type “default pages” This is because all default osCommerce pages are automatically added to this page/profile type
The first 4 rows contain entries for special page/profile types, as follows:
- Index – Front page: This is the front page. There is just one front page in your store and you can attach to it only profiles of type “front page”. The profile attached to this page, will affect the front page only
- Index – subcategory listing: That are the pages that list categories that have subcategories attached. You can attach profiles of this type only. The profile attached to this page, will affect all pages that list subcategories.
- Index – product listing : That are the pages that list the products. You can attach profiles of this type only. The profile attached to this page, will affect all pages that list products either of a specific category or of a manufacturer .
- Product information: That is the page that display the product details. You can attach profiles of this type only. The profile attached to this page, will affect allProduct information pages
For category listings, product listings and product information pages you can do of course individual settings and attach each category or product to a specific profile. The profile for a specific product or category will have priority over the general profile. In other words, the settings you do here for the product information pages will apply to all product informations pages that do not have a specific profile attached
Next step is to see how to do that specific settings
Manage products and categories
Here you can attach any category or subcategory of any level and any product to a specific profile. This makes a sense of course only if that profile is a different one than the general you use for products or categories
Add products and categories to profiles
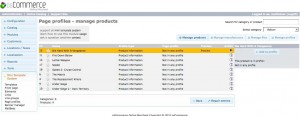
To get to this area, please click on “manage products” at the top menu.
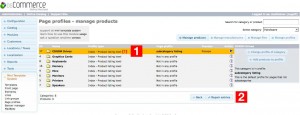
The page layout is very similar to what you have under categories > products in your administration panel. You can navigate through all products and categories in the same way you do it there. You can of course search for a specific product or jump directly to it
The listing of your the products/categories contain
- the product / category name
- The profile type: This can be either “product listing” or “subcategory listing” or “product information” depending on your exact location in the categories tree
- Preview: Here you can preview the page in a fancybox window, without having to navigate through the stores front side. So you can check how a specific page look like when attached to a profile and do changes accordingly
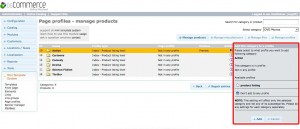
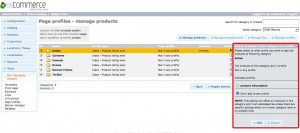
To attach a category to a profile is easy. Click on “add category to profile” on the right side and select the profile you want to add this page too.
Depending on the type of the category (if it has products or other subcategories attached), you will get a listing of all profiles available for this type, that mean either profiles for product listing pages or profiles for subcategory listing pages
To attach a product to a profile, you can go on in 2 ways
- Add a specific product to a profile: Just select the product and click “add to profile” on the right
- Add all products of a category to a profile: This you can do by selecting a category and then clicking on “add products to profile”
In both cases you can select from any available product information profile types
Important to keep in mind is that, when you add a category to a profile, the setting affect only the selected category, not any of its subcategories, while when adding all products of a category to a profile, this will affect all products of the selected category and of all subcategories.
As mentioned before, any specific settings have priority over the general settings. Let’s say for example, you have product “printer” added to profile A. You have all products of category “printers” added to profile B. You have also all products of category “hardware” , to what the printer belong, added to profile C. Finally you have all product information pages attached to profile D.
How will the display be in this case?
Product printer will display using profile A, because this is the most specific setting. Any other products of category “printers” will be using profile B. All other products of category “hardware” will display using profile B, doesn’t matter how deep they are in the category tree . All other products, like the products of category “software” will be using profile D
Repair Entries
Most of the actions you do when adding or removing products and categories to your store will update automatically the page profile entries
There is however the case that a specific category will change it’s “profile type”. This can happen in case you add some subcategories to a category that was previously listing products. Or in case you delete any subcategories of a category, letting it to display just products.
In this cases the type of the category and the page profiles entry do not match anymore. The category may have product listing modules attached, while it is in real a category that list subcategories.
In this cases you will get a “warning” that telling you about the error. This you can easily correct, in 2 ways
- by changing the profile of the category that has the problem (attach a product listing profile instead of the subcategory profile or opposite)
- By clicking on “repair entries” at the bottom of the page. This will reset any wrong entries for the complete product categories tree, leaving the correct entries in place of course
Worth to mention is that, in case you have both attached to a category, subcategories and products, the page profiles will react on this in the same way as osCommerce does by default, give priority to the product listing and add the category to type “product listing”
Manage manufacturer listings
Next thing you can do is, to add pages that list products of a specific manufacturer to a profile
Add manufacturer pages to profiles
To get to this area, please click on “manage manufeacturers” at the top menu.
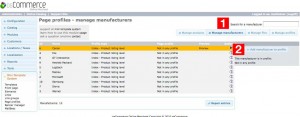
The listing of your files contain
- the manufacturer name
- The profile type: All pages that list products of a manufacturer belong to type “product listing”
- The page profile: Here you can see to what page profile the page is attached to
- Preview: Here you can preview the page in a fancybox window, without having to navigate through the stores front side. So you can check how a specific page look like when attached to a profile and do changes accordingly
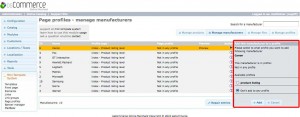
To attach a page to a profile is easy. Click on “add to profile” on the right side and select the profile you want to add this page too.
There will be concrete tutorials and examples about how to use this features soon, please stay tuned on our google + page

