more

Current version: 1.4_b
updated: 3 May 2012

Front page manager: Configure your store’s front page

Mini template system includes since version 1.3 a powerful tool to configure and manage the store’s front page: The front page manager that will turn your store’s front page into a modular and easy to configure area. You will learn here how to use it.

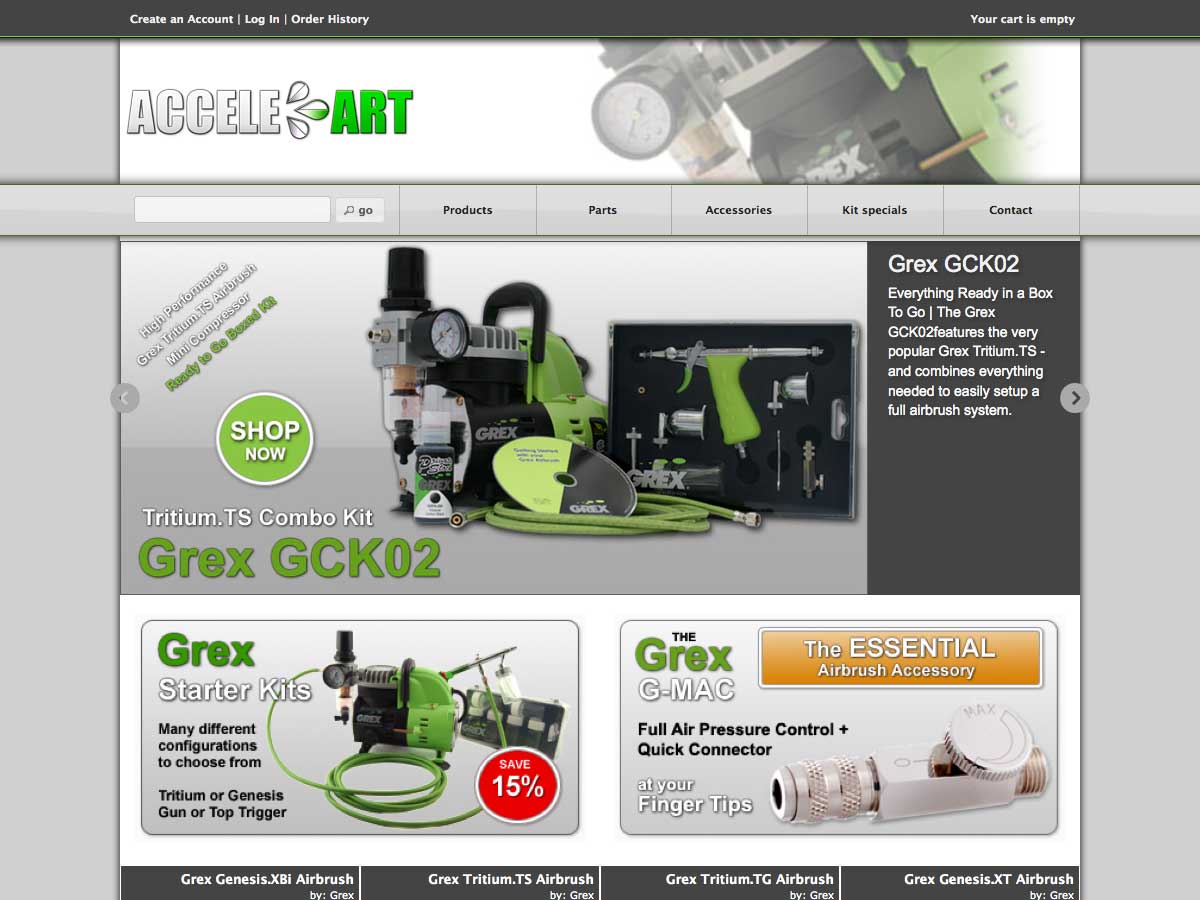
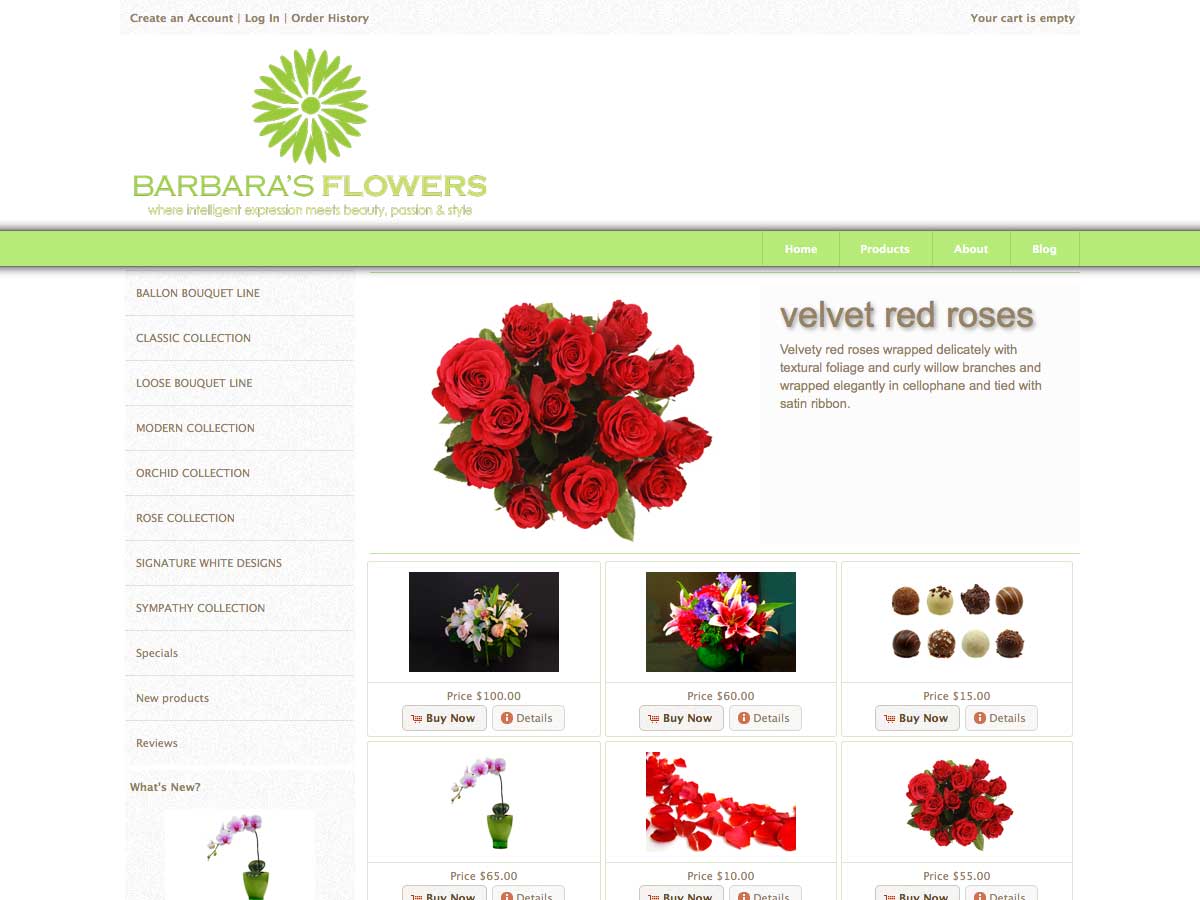
The default front page content consist in osCommerce of a so called “customer greeting” and the “new products module” that list the last added products. The front page manager replace this all by several modules. In other words: The store’s front page becomes totally modular and configurable in the admin panel: You can setup the front page to display images, banners, categories or products in any order and with various display options

Following modules are available in version 1.3: banner sliders, categories, new products, bestsellers and specials. Each module can be configured in various ways and new modules can be added easily on request


Install a front page module

The process to install a front page module is exactly the same like installing an osCommerce “box”. All you have to do is to go to the “mini template system” area of your administration panel, click on “front page” and then click the “install” button in the top right corner of the page. Choose any of the modules and then click “install” again.

Installing a front page module: Select the module you want to install and click "install"Installing a front page module: a 3 click process

Please make sure that before doing this, you have the banner manager already installed.

After a front page module is correctly installed, you can start to configure it. To install more modules, just repeat the installation process for each module you want to install

In case you have more than one module installed, you need to set its “sort order”, this is the order it will be displayed on the front page.


Configure the front page modules

Configuring the front page modules means to make decisions about the content, about the layout, about sliding effects and finally about the text and background colors.

To start with the configuration of each front page module please press on “edit” on the right hand panel


Front page: banner modules

configuration top | page top


You have by default 2 banner sliders installed. First thing is to decide about the content of the sliders. You can use any of the banner groups you have already created using the banner manager. You can read here about how to create banners and banner groups

Banner content

banners top


In this setup example we are going to use the banner group “image and text”. You will find the same banner group in your installation. That means that all contents of this group will be the contents of the banner slider. This banner group is set up in that way, that it contains images, a text heading and a short description

The existing banner groups available from the banner manager


To set a banner group to be displayed, simply select it from the drop down menu

Select a banner group to be the content of your banner slider


Press on “save” and go to your store to see the result. The default osCommerce front page content has been replaced by a sliding banner.

The front page banner in default mode. You have more that 50 configuration options available


Next step is to start doing configuration settings

General banner configuration

banners top


You can make following decisions

  • Display mode: You can select if you want the banners to be displayed as a slider or as a grid. Selecting “grid” you will get a static display of images and/or text on the front page. This is a very convenient way to place any type of content to the front page, since banners can contain images, text or any html, such as videos etc
  • Number of items: This is the total number of items to be displayed. Your banner group can contain eg 20 banners, if you set this number to 5, only the first 5 banners of the group will be dispayed
  • Items per row: In case of a display as a “grid” the number set the banners per row. After this number is reached, and if there are still more banners to display, a new row will start. In case of a display as a “slider” the number set the the banners to be displayed at the same time on the screen. Each sliding “caption” can consist of 1 banner (that’s the most common setting) or more.
  • Not enough items: Here you can decide what to do with the module in case the total available items are less that the selected items per row. If you select for example to display 5 items per row, but you have only 3 banners activated and available in the banner manager. Available settings are “hide” and “display”.

Please note: Banners do adjust their size automatically to the available width. That mean that the same banner image will fill the complete main content width in case it is displayed alone, but only 50% of the width in case you decide to display 2 banners per row. So you don’t need to worry about the actual size of your images, just to make sure that all of them are in the same ratio, since the module does not crop them, but resize them proportionally.

Slider settings

banners top


Slider settings are same for all front page modules, please check the section slider settings for details. Please note that any settings in this section are relevant only in case you selected “slider” as a display mode

Design and color settings

banners top


Next set of settings you can do are about the design and layout of your banners. Settings will apply in both cases of display, as a grid or as a slider

  • Container padding: The top and bottom padding of the container that holds the banners in pixels. You enter add any number
  • Container background: The background color of the container that holds the boxes. You can select the color using the colorpicker or by entering the hex value without # in front (eg ff0000 for red)
  • Container border: Select if you want a border the container that holds the banners. (only top and bottom border)
  • Container border thickness: You can set the border thickness in pixels
  • Container border color: You can select the border color using the colorpicker or by entering the hex value without # in front (eg ff0000 for red)
  • Boxes margin: you can set the distance of the banners to each other in pixels. In case you have just one banner per row, this will set the left and right margin of this banner from the page edge
  • Boxes border: Select if you want a border around each banner
  • Boxes border thickness: You can set the border thickness in pixels
  • Boxes border color: You can select the border color using the colorpicker or by entering the hex value without # in front (eg ff0000 for red)
  • Boxes border hover color: The color of the border upon hover. This is a nice way to highlight the selected banner
  • Boxes content background color: The background color for the banners. If your banner consist just of an image, this setting is irrelevant. If you are going to use any text, this will be the text background color.

Image and text settings

banners top


In case you added also a text for your banners using the banner manager, you can also do following settings

  • Display text: Decide if you want to display title and description of the banner. You have following options: no, to not display any text, captions, to display a text as an image caption, that will appear upon hover and screen to display the text beside the banner permanently on the screen
  • Image position: In case you selected “screen” you can decide if you want the text to appear on the left or right of the banner image
  • Image size: In case of screen you can set how many percent of the available space the image should occupy. For example, if you have set 1 item per row and you set this setting to 30, the image will occupy 30% of the page content. If you have 2 banners per row, and you set this setting to 50, then the image will occupy 50% of the half of the screen, that means 25%. Any resizing happens automatically. What you need to take care of is, that all of your images have exactly the same ration, eg they are all square, or are all in 3:2 etc
  • Caption direction: In case you decided the text to be displayed as a caption upon hover, you can now select the direction you want the this caption to appear from. Available options are top, bottom, left, right. Captions do use a decent animation effect when appearing
  • Caption background color: Captions use by default a semi transparent color, depending on the chosen color scheme. You can change this by selecting any color using the colorpicker
  • Title align: That is the alignment of the banner heading you entered via the banner manager Available options are left, right, center
  • Text align: That is the alignment of the banner text you entered via the banner manager Available options are left, right, center and justify
  • Title size: The size of the banner heading in pixels
  • Text size: The size of the banner text in pixels
  • Title color: The color of the banner heading
  • Text color: The color of the banner text
  • Title shadow: Select if you want a css shadow effect to be used for the banner heading. Please note that this feature is supported only by browsers that suppot css3. It will not be visible in IE8 for example. In this cases a common plain text will be displayed
  • Text shadow: Select if you want a css shadow effect to be used for the banner text

Please note following limitations: Text shadow is supported only by browsers that suppot css3. It will not be visible in IE8 for example. In this cases a common plain text will be displayed. Banner captions are also supported only by browsers that support the HTML5 elements “figure” and “figurecaption”, again, IE8 and other older browsers do not support this. If you need to support older browsers, please choose an other display way for banners text


Front page: product modules

configuration top | page top


Here you will learn to configure front page modules that contain products. Available modules are: New products, specials and bestsellers.

The settings are same for all modules, except some small differences regarding the displayed content, that are explained separately.

Module content

product modules top


The content of each module depends on the module it self: The “new products” module will display the latest products added to your store, the “specials” module will display your stores specials (you can set this in your admin panel under catalog>specials) and the “bestsellers” module will display your best selling products in reverse order of the quantities sold

What you can do when configuring the module is, to select the category the displayed products should be pulled from. So you can for example say that you want to display new products of category “hardware” or specials of category “dvd movies” Please note that, in case you select a main category that has subcategories but no direct products added to it, all products of all related subcategories will be added to the selection. In case you select a (sub) category that has products added directly to it, that products will be used for the selection

You can also select the if you want to display the module title, this is the text displaying eg “new products for May”. You can switch this on or off as per your needs

Select the category of products to display on your front pageSwitch the module title on or off easily


Set a sort order for the module and press on “save” and go to your store to see the result. You wll see the selected products on your front page

This is how new products will appear on your front page after installing the module. You can configure any detail


Next step is to start doing configuration settings

General product modules configuration

product modules top


You can make following decisions

  • Display mode: You can select if you want the product boxes to be displayed as a slider as a grid or in default mode. Selecting “grid” you will get a static display of boxes on the front page. You can configure the content of the boxes in the next steps. Selecting “slider” you will get the same boxes in a horizontal slider. Selecting “default” you will get a the default osCommerce way of listing, but you will be still able to do some configuration settings to this too.
  • Number of products: This is the total number of products to be displayed. You can have for example 50 special products, if you set this number to 6, only the first 6 products will be dispayed
  • Products per row: In case of a display as a “grid” or in “default” mode the number set the products per row. After this number is reached, and if there are still more banners to display, a new row will start. In case of a display as a “slider” the number set the the product boxes to be displayed at the same time on the screen. So you can select for example to display your products in sets of 3
  • Not enough products: Here you can decide what to do with the module in case the total available products are less that the selected products per row. If you select for example to display 4 specials per row, but you have only 3 specials products set. Available settings are “hide” and “display”.

Slider settings

product modules top


Slider settings are same for all front page modules, please check the section slider settings for details. Please note that any settings in this section are relevant only in case you selected “slider” as a display mode

Product boxes content

product modules top


Next set of settings you can do are about the content of each product box, in other words you can decide why kind of information you want to display for each product. Please note that following settings are valid only in case of a “grid” or “slider” display. In case you choose the “default” osCommerce mode, the module will display the products image, products name and products price

  • Display products name: Select if you want to display the products name
  • Display products model: Select if you want to display the products model
  • Display products manufacturer: Select if you want to display the products manufacturer. In case of yes, the displayed manufacturer name will be a link to all products of this manufacturer i your store
  • Display products image: Select if you want to display the products image. The image size is same as the “small image size” used for all product listings. You can set this in your administration panel under configuration > images
  • Display products description: Select if you want to display the products description
  • Description length: You can set how many characters of the product description do you want to display.
  • Display products price: Select if you want to display the products price
  • Display products quantity: Select if you want to display the quantity you have in stock
  • Display offer expiration date: (specials only) Select if you want to display the expirration date of the offer
  • Display date added: (new products only) Select if you want to display the date the product was added to your store
  • Display number of sales: (bestsellers only) Select if you want to display the total number of products sold
  • Display “buy now” button: Select if you want to display the “buy now” button. Pressing this, the product will be added to the customers cart, in case it has no options. If it has, the button behaves as a link to the product information page
  • Display “details” button: Select if you want to display the “details” button,that will link to the product information page.

Design and color settings

product modules top


Next set of settings you can do are about the design and layout of the product boxes. Settings will apply in both cases of display, as a grid or as a slider, but not in case of the “default” display

  • Basic style: Here you can select if you want the style of the listing to be based on the themeroller theme or the css color scheme. In any case you will be able to change any of the default settings below. Leaving the below settings empty mean that the default values, depending on your selection here, will be used
  • Box heading text align: You can align the box heading to the left, to the right, or place it to the center of the box
  • Container padding: This is the top and bottom padding of the container that holds the product boxes. You can enter any value in pixels
  • Container background: This is the background color of the container that holds the product boxes. You can select any color intuitively, using the colorpicker
  • Container border: Select if you want a border for the container that holds the product boxes. (only top and bottom border)
  • Container border thickness: You can set the border thickness in pixels
  • Container border color: You can select the border color using the colorpicker or by entering the hex value without # in front (eg ff0000 for red)
  • Boxes margin: This is the distance of the boxes to each other in pixels. You can enter any value.
  • Boxes border: Select if you want the product boxes to have a border. Please note that if you use “ui widget” as a basic style, there will be most likely a border coming from the selected ui theme. The border you add here will be an additional border
  • Boxes border thickness: The thickness of the product boxes border in pixels
  • Boxes border color: The color of the product boxes border
  • Boxes border hover color: The color of the product boxes border upon hover
  • Boxes heading background color: This is the background color of the box headers, you can select ay color using the color picker
  • Boxes content background color: This is the background color of the box body
  • Boxes footer background color: This is the background color of the box footer area.
  • Boxes footer border color: This is the color of the thin line that peparates the box body from the box footer. If you don’t want any line there, you can set this color same as the body or the footer background color
  • Boxes heading text color: This is the text and link color of the box header
  • Boxes content text color: This is the text and link color of the box content
  • Boxes footer text color: This is the text and link color of the box footer. The text color of the buttons get not affected by your choice here


Front page: categories module

configuration top | page top


Here you will learn to configure the front page module that contain your product categories.

You can display any category or subcategory on the frontpage. To do this, simply select a parent category from the drop down menu. All its subcategories will be displayed on the front page. If you want for example to display your top level categories, select “top” on the dropdown menu. If you want to display all DVD movie categories, then select “dvd movies” as the parent category. In any case please be sure to select a category that has subcategories. The drop down menu is structured in such a way, to help you identify this.

You can also select the if you want to display the module title, this is the text displaying eg “new products for May”. You can switch this on or off as per your needs

Select any category or subcategory you want to display on the front page


Set a sort order for the module and press on “save” and go to your store to see the result. You wll see the selected categories on your front page

Top level categories on the front page. You can select any subcategory you like


Next step is to start doing configuration settings

General categories module configuration

categories module top


You can make following decisions:

  • Display mode: You can select if you want the categories boxes to be displayed as a slider as a grid or in default mode. Selecting “grid” you will get a static display of boxes on the front page. You can configure the content of the boxes in the next steps. Selecting “slider” you will get the same boxes in a horizontal slider. Selecting “default” you will get a the default osCommerce way of listing, but you will be still able to do some configuration settings to this too.
  • Number of categories: This is the total number of categories to be displayed. You can have for example 10 top level categories in your store, if you set this number to 3, only the first 3 categories will be dispayed
    Tip: Since you can set the sort order of your product categories, when setting them up in admin, you can create in that way something like “featured categories” and display them on the front page
  • Categories per row: In case of a display as a “grid” or in “default” mode you can set the number of categories to be displayed per row. After this number is reached, and if there are still more categories to display, a new row will start. In case of a display as a “slider” the number sets the the category boxes to be displayed at the same time on the screen. So you can select for example to display your categories in sets of 4
  • Not enough categories: Here you can decide what to do with the module in case the total available categories are less that the selected categories per row. If you select for example to display 4 categories per row, but you have only 3 subcategories in this parent category. Available settings are “hide” and “display”.

Slider settings

categories module top


Slider settings are same for all front page modules, please check the section slider settings for details. Please note that any settings in this section are relevant only in case you selected “slider” as a display mode

Categories boxes content

categories module top


Next set of settings you can do are about the content of each category box, in other words you can decide why kind of information you want to display for each category. Please note that following settings are valid only in case of a “grid” or “slider” display. In case you choose the “default” osCommerce mode, the module will display the categories image and the categories name under it

  • Display categories name: Select if you want to display the categories name
  • Display categories image: Select if you want to display the categories image. The image size is same as the “subcategory image size” used for all product listings when displaying subcategories. You can set this in your administration panel under configuration > images

Design and color settings

categories module top


Next set of settings you can do are about the design and layout of the categories boxes. Settings will apply in both cases of display, as a grid or as a slider, but not in case of the “default” display

  • Basic style: Here you can select if you want the style of the listing to be based on the themeroller theme or the css color scheme. In any case you will be able to change any of the default settings below. Leaving the below settings empty mean that the default values, depending on your selection here, will be used
  • Box heading text align: You can align the box heading to the left, to the right, or place it to the center of the box
  • Box heading placement: You can decide if you want the categories name to be on top or under the categories image
  • Container padding: This is the top and bottom padding of the container that holds the categories boxes
  • Container background: This is the background color of the container that holds the categories boxes. You can select any color intuitively, using the colorpicker
  • Container border: Select if you want a border for the container that holds the categories boxes. (only top and bottom border)
  • Container border thickness: You can set the border thickness in pixels
  • Container border color: You can select the border color using the colorpicker or by entering the hex value without # in front (eg ff0000 for red)
  • Boxes margin: This is the distance of the boxes to each other in pixels. You can enter any value, default is 2 pixels.
  • Boxes border: Select if you want the category boxes to have a border. Please note that if you use “ui widget” as a basic style, there will be most likely a border coming from the selected ui theme. The border you add here will be an additional border
  • Boxes border thickness: The thickness of the boxes border in pixels
  • Boxes border color: The color of the category boxes border
  • Boxes border hover color: The color of the boxes border upon hover
  • Boxes heading background color: This is the background color of the box headers, you can select ay color using the color picker. Please note that even referred as “box header”, it can be displayed on top or bottom of the box, depending on your settings above
  • Boxes content background color: This is the background color of the box body
  • Boxes heading text color: This is the text and link color of the box header


You can make following decisions in case you decide to display your banners in slider mode. In case you have “grid” enabled any of followings settings is irrelevant.

  • Slider mode: You can select in what way you want to display the slider. Options available are fade – banners will be using a fade effect when changing, horizontal – banners will be scrolling horizontally and vertical – banners will be scrolling vertically. Please note that, in case you use “vertical” the number of items per row will be set automatically to 1
  • Slider effect: Here you have 31 easing effects to choose from. Please note that settings apply only in case you selected a vertical or horizontal scrolling above
  • Sliding speed: That is the speed you want the banners to move. Setting is in miliseconds
  • Items to move: Here you can decide how many items do you want to be moved on each click. Do not set this number higher than the number of items you display per row. Best is you set it equal.
  • Endless loop: You can decide if you want the slider loop to be endless. In case of yes the first slide will de added to the end of the loop, giving the impression of an endless loop
  • Display slider controls: You can decide if you want to display the previous/next arrows
  • Hide slider controls at end: You can decide if you want to hide the slider control arrows at the end of the loop, in case “endless loop” is set to “no”
  • Display pager: You can decide if you want to display a pager at the bottom of the slider. The “pager” is a line of numbered links, each of them leads to an other banner slide.
  • Automode: You can decide if you want to set the slides to move (or fade) automatically
  • Autostart: In case you have “automode” selected, you can now decide if you want the sliding show to start automatically upon page load
  • Delay auto start: In case you have “autostart” selected you can delay the start by the number of milliseconds entered into this field
  • Pause time: In case you have “automode” selected you can set here the time in miliseconds you want each slider to be visible (paused) on the screen.
  • Auto hover: In case you have “automode” selected you can decide if you want the slideshow to stop upon hover
  • Start/stop control: In case you have “automode” selected, you can decide if you want to display a “start/stop” button to begin the slideshow. This will be needed if you don’t have “autostart” enabled