In case you want to upgrade your existing, customized, jQuery UI theme to be comatible with the latest jQuery UI version, please follow the steps below. The process is very easy and there are no files to edit
In this instructions we are going to update the default mini template system theme “susy q”. This is a theme that we created online using themeroller. Your theme may be one of the existing themes or any other that you created your self and named anything
Step 1: find your existing theme
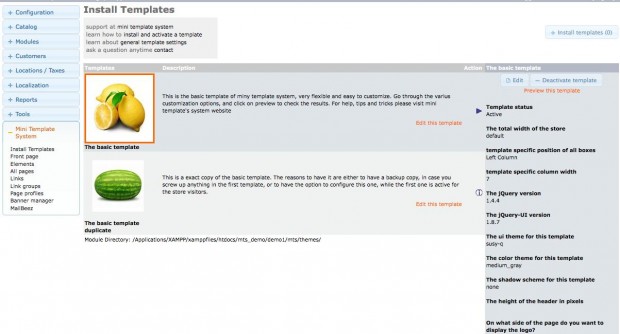
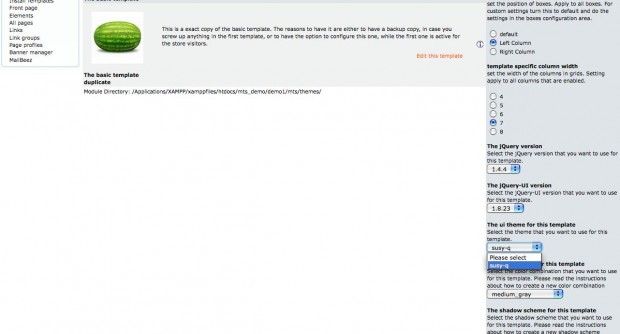
First check in your administration panel to see what theme you template is using. Please go to the mini template system area of your administration panel, select the template in use and check the line that says: “The ui theme of this template”. In our example this is “susy q”
Then please use your ftp client (or host cPanel) and navigate to following file
Instead of “susy q” you can have “smoothness” or “redmond” or any custom name you used for your custom theme. Also, the version number of the file (1.8.7) may be an other, depending on upgrades you did before
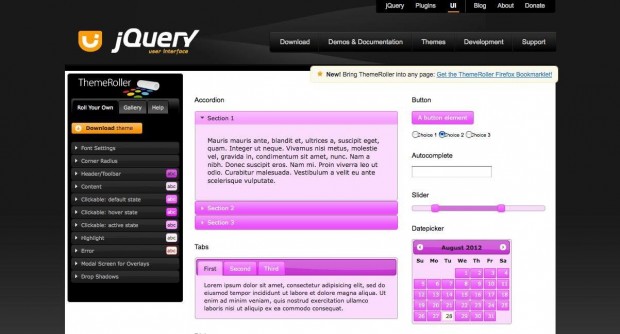
Please open the file, and find near the top the following line: “To view and modify this theme, visit”. Copy the long link after that and enter it into your browser url line.
You will get redirected to the themeroller page, all ui theme settings will be in place.
Step 2 Downoad the new version of the same theme
All you have to do now is to download the theme. Please don’t change anything at the settings and just download the theme
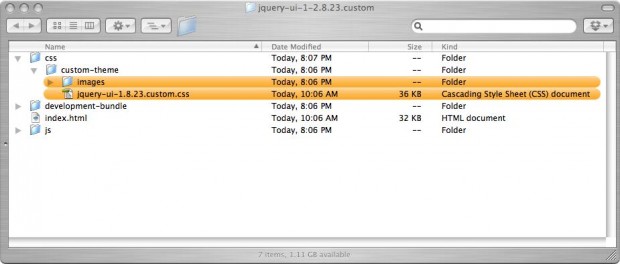
You will get the same folder as if downloading a completely new theme. From this folder we need just the css file and the images folder. The items we need are marked in orange in the image below
Here you need to rename the css file and strip out the word “custom”. Instead of “jquery-ui-1.8.23.custom.css” the filename will be “jquery-ui-1.8.23.css”
Step 3: Upload updated theme to your server
What we need to do now is, to upload the updated theme files to the same location on the server, where our existing – current theme is. In our example this is
Instead of “susy q” you can have “smoothness” or “redmond” or any custom name you used for your custom theme.
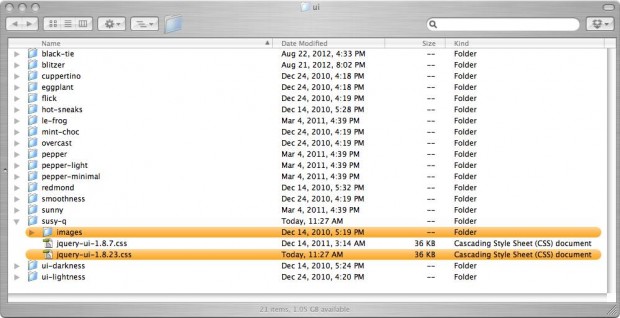
We are going now to replace the existing images folder and add the new css file beside the existing one
The folder on the server will look like this after the file upload (new files are marked in orange)
Step 4: Enable the updated theme
Please login to your osCommerce administration panel and navigate to the mini template system area and click “edit” for the template you want to use the updated theme on
You need to select the matching jQuery UI version first, in our example this is version 1.8.23. In case you didn’t update your store to this, please check here about how to upgrade the jQuery UI version of your store
Once the latest jQuery UI version is selected, the next drop down, that is about the UI theme, will update automatically and show you any available matching themes, one of them will be the one you just updated
Please select it and press save

